General
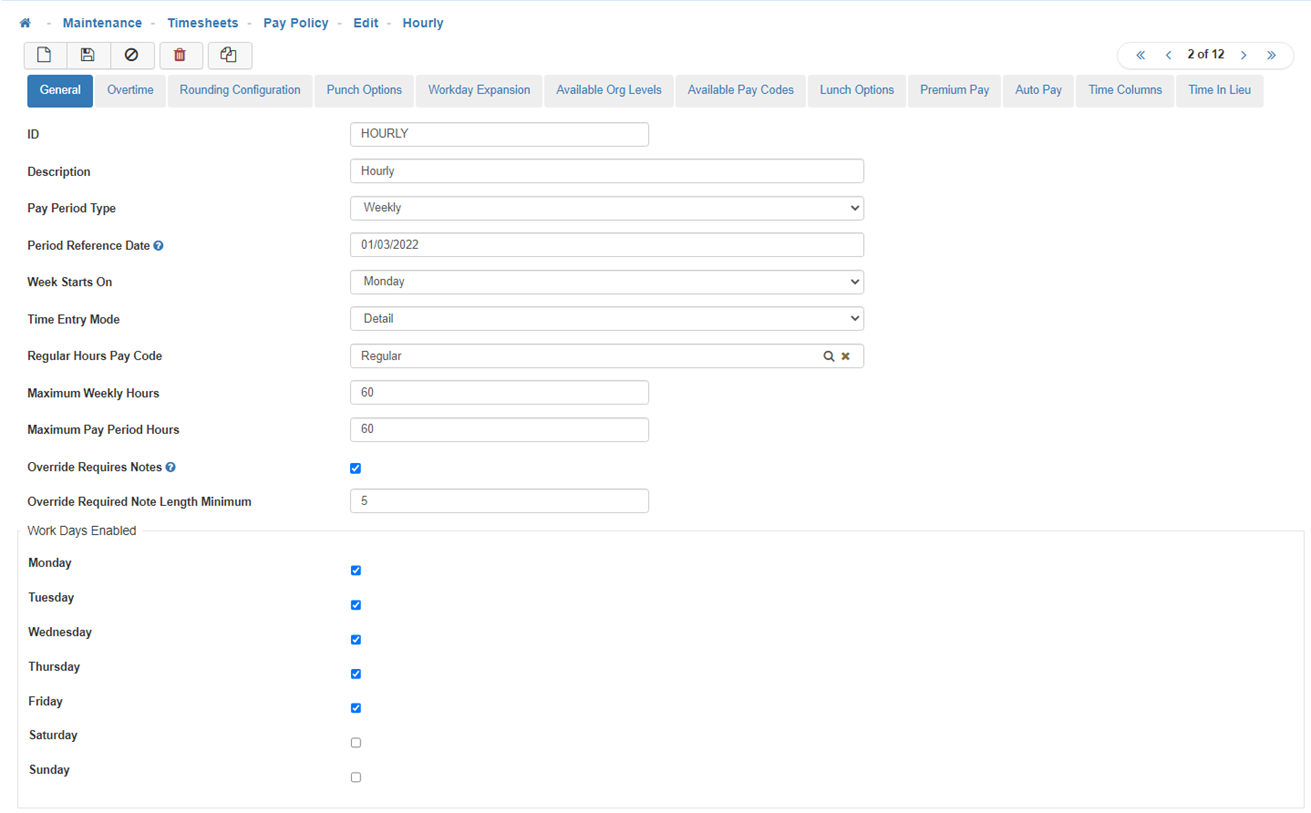
The General Tab allows you to give the Pay Policy a unique name (ID) and description, a Pay Period Type (I.e., Weekly, Bi-weekly etc.), a date the Pay Policy will take effect, the day of the week the Pay Policy will start on, and many more features related to the General features of the Pay Policy.
General Tab
-
ID & Description
The suggested way to select an ID and Description is to name it based on how the Employee(s) will be getting paid or how the Time will be calculated. (E.g. Hourly/Non-Exempt & Salary/Exempt.)
Note: The ID you create will display next to the Pay Period dates list box in the Timesheet Detail screen. -
Pay Period Type
Determines Employee pay frequency. (I.e. weekly, biweekly, monthly, etc.) -
Period Reference Date
This is the actual date for the start of this Pay Policies pay cycle. -
Week Starts On
Use this to select what day the week starts on. This is used when the system is calculating Weekly Overtime. -
Time Entry Mode
Determines which Timesheet view the Employees with this Pay Policy will see.-
Detail
Gives the option to add/alter In and Out times. This is perfect for an Hourly employee who is using the Kiosk. If Detail is not selected you might run into situations you cannot correct. (E.g. If an Employee forgets to punch out, a Manger will not be able to add an Out time if the Time Entry Mode is not set to Detail.) -
Summary
Is a simple entry screen where the Employee would be responsible for entering the exact number of hours that relate to Regular Time, Overtime, Double Overtime, etc. -
Summary Calculated
Automatically calculates everything for an Employee. The Employee only needs to enter their hours and the system will do the rest. Note: They do, however, have the option to Override (OVR) in case a change needs to be made.
-
-
Regular Hours Pay Code
The Pay Code selected here will be automatically applied to the Time Entry line of the Employee(s) assigned to this Pay Policy. -
Maximum Weekly Hours
Here you set the maximum number of hours an Employee can work in a week. -
Maximum Pay Period Hours
Here you set the maximum number of hours an Employee can work during a Pay Period. Pay Period refers to the Pay Period Type selected above. -
Override Requires Notes
When this feature is enabled it will require Notes to be entered whenever manual additions or modifications are made to Time Line Entries.
Note: If enabled, this will block the Timesheet from being saved or submitted until the Notes are entered. -
Override Required Note Length Minimum
This feature will only be available when 'Override Requires Notes' is enabled. The value set here will determine the minimum number of characters required when entering Time Line Entry Notes.
Note: LightWork automatically defaults this to a minimum of 5 characters required, but this can be adjusted according to your preference by modifying this value. -
Work Days Enabled
Here you will select the days of the week that will be considered 'Working Days' within the Pay Policy. For example, if the Employees that this Pay Policy will be assigned to only work Monday through Friday, you would only select the checkboxes for those days and leave the checkboxes disabled for Saturday and Sunday.
Note: This will allow Employees to select a 'Date Range' when entering Time Off Requests instead of adding each day individually, and only the Working Days assigned to their Pay Policy will be applied to the Time Off Request for the Date Range they select. The 'Work Days' enabled here will also assist in determining an Employee's qualification for Holiday Pay when 'Day Before', 'Day After', or 'Before Or After' are enabled within the Employee's assigned Holiday Policy. -
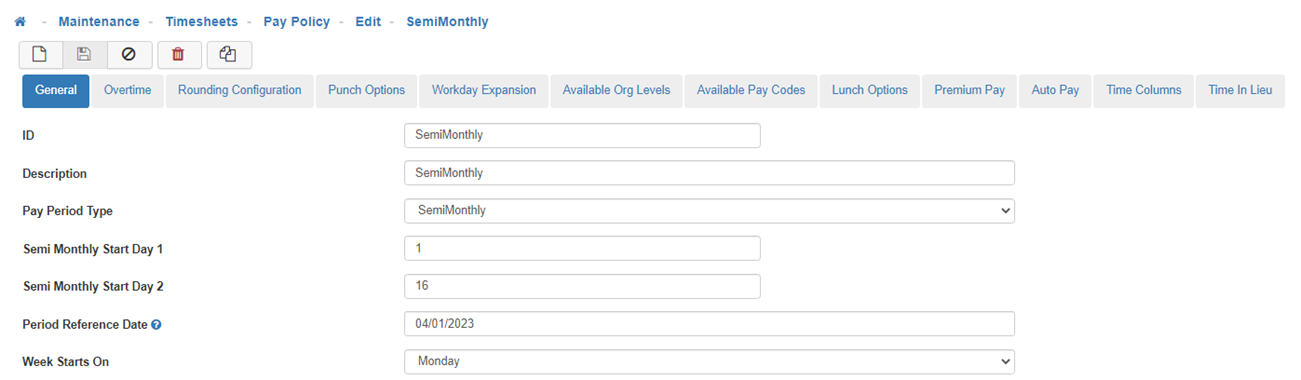
Semi Monthly Pay Period Type
When a Semi Monthly Pay Period Type is selected it will require two additional fields to be configured 'Semi Monthly Start Day 1' and 'Semi Monthly Start Day 2'.
Note: The 'Period Reference Date' must be set to the same date as either 'Semi Monthly Start Day 1' or 'Semi Monthly Start Day 2' when a Semi Monthly Pay Period Type is selected.-
Semi Monthly Start Day 1
Indicates the Date the first Pay Period of each month will start on. -
Semi Monthly Start Day 2
Indicates the Date the second Pay Period of each month will start on.
-
-
Save
Once you are satisfied with your selections, click on 'Save'.